Thursday, April 21, 2011

blueberry brown oat cookies


Its pretty well known that I love cookies.  But do you also know how much I love blueberries?  And because summer is creeping up slowly, my obsession is only going to become even more prevalent.  Beware.  I'll put blueberries on anything.  Protein shakes, pancakes, toast, cereal...you name it, if I've got blueberries, they'll be in my every meal.


So when I randomly picked up the blueberry version of Craisins the other night at the grocery store (don't ask why, I couldn't tell you) I have been thinking about these things ever since.  Scones?  Been there.  Muffins?  Not the biggest muffin fan.  Cookies?  Hmm...I'm intrigued.  Could I finally have a chance to try my hand at a whole wheat cookie and make it a hearty little bugger?


Ladies and gentlemen, I think we have ourselves a kitchen success.  Pretty good sendoff to this treacherous kitchen, if you ask me.  The combination of the whole wheat flour, cinnamon, oats, and brown butter make this a very tasty little thing.  And oddly enough, since I ran out of granulated sugar, I only used brown sugar [hence the name - I'm quite clever, I know.]  But honestly, I think it really enhances the nuttiness of the brown butter and the overall heartiness of the cookie.  Adding walnuts would probably also be a great idea; I just didn't feel like it at the time.  But please let me know if you do!


Blueberry Brown Oat Cookies
recipe from yours truly


1 cup whole wheat flour
1/2 cup all-purpose flour
1/2 cup oats
3/4 teaspoon cinnamon
3/4 teaspoon baking powder
1/4 teaspoon baking soda
1/4 teaspoon salt
1/4 cup (1 stick) unsalted butter
1 cup brown sugar
1 egg
1 teaspoon vanilla
3/4 cup dried blueberries
1/4 cup walnuts, chopped (optional)

  1. Preheat oven to 350 degrees.
  2. Brown butter in medium saucepan, about 7 minutes, until foam is gone and brown specks appear.
  3. Place brown sugar in a large mixing bowl, and once butter is browned, immediately pour over sugar.  Let butter cool into sugar for about 10 minutes.
  4. Meanwhile, combine flours, oats, cinnamon, salt, baking powder, and baking soda in a small mixing bowl and mix well.
  5. Once butter is cooled, add egg and beat until well incorporated.  Add vanilla.
  6. Add half of the flour mixture to the wet ingredients, stirring thoroughly but not too much, until just incorporated. Add the other half of flour mixture, following same technique. Dough should be sticky and not at all runny—if it is, add more all-purpose flour, one tablespoon at a time, until dough is thick and drier.
  7. Gently stir in blueberries and walnuts, if desired, until well distributed, and place in the refrigerator to cool, about 10 minutes.
  8. Spoon dough onto a parchment-paper lined baking sheet, about 1 inch in diameter and somewhat rounded. Bake for approximately 8 minutes, or until cookies appear brown on edges and small bubbles appear in the middle.
Makes about one dozen cookies. Recipe is easily doubled.

Wednesday, April 20, 2011

ice cream cone cupcakes


Do you know how much I love birthdays?  Do you?  Because it'd be pretty hard not to notice.  It'd also be pretty hard to match my enthusiasm.


Enter cupcake cones.


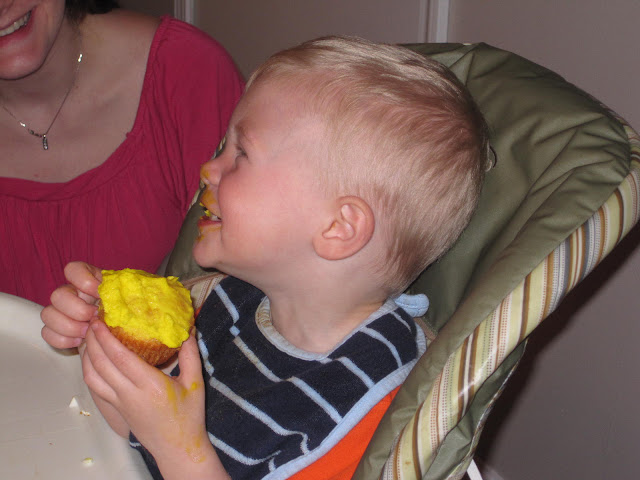
I asked my sister a while back if I could have the honor of baking my precious nephew's cake for his 2nd (!) birthday party this past weekend, and luckily, I was dubbed Queen Cupcake.  No, really.  Aidan has officially come to associate me with cake.  He'll ask me to pick him up, walk me to the counter where these bad boys were sitting, and say in his ever-so-sweet tone, "caaaaaaaake?"


Yeah, that's my nephew.  Should also be no surprise that I'm posting this specifically on my precious his actual birthday - Happy Birthday to you, Aidan Thomas!]

So when I was deciding which cake recipe to try, I wanted to challenge myself.  Bobby's recipe was great that one time, and definitely a different technique than what I was used to, but I wanted to aim even higher.  Cooks Illustrated level.  And man, did that pay off.  This cake is amazing.  So flavorful, perfect amount of moistness (even baked in the cones), and last but not least, fun to make.  I'll make this again in a heart beat!  Unfortunately, I can't take all of the credit for the ice cream cones idea - neither of us can tell you where, or when, but sometime in our childhood, Erin and I had these.  So naturally, I had to recreate them for my nephew.  Purely selfless, if you ask me.  Regardless, these turned out wonderfully.  Try them at your next birthday party - they won't be forgotten!


Ice Cream Cone Cupcakes
Cupcake recipe adapted from Cooks Illustrated; frosting recipe from yours truly

2 1/4 cups cake flour (9 ounces), plus more for dusting the pans
1 cup whole milk, at room temperature
6 large egg whites (3/4 cup), at room temperature
2 teaspoons almond extract
1 teaspoon vanilla extract
1 3/4 cups granulated sugar (12 1/4 ounces)
4 teaspoons baking powder
1 teaspoon table salt
12 tablespoons unsalted butter (1 1/2 sticks), softened but still cool

48 cake ice cream cones
Two servings of your favorite frosting [I doubled my tried and true buttercream recipe]
  1. Set oven rack in middle position. (If oven is too small to cook both layers on a single rack, set racks in upper-middle and lower-middle positions.) Heat oven to 350 degrees. Place ice cream cones in cupcake pan liners and set aside. 
  2. Pour milk, egg whites, and extracts into small bowl, and mix with fork until blended. 
  3. Mix cake flour, sugar, baking powder, and salt in bowl of electric mixer at slow speed. Add butter; continue beating at slow speed until mixture resembles moist crumbs, with no powdery streaks remaining. 
  4. Add all but 1/2 cup of milk mixture to crumbs and beat at medium speed (or high speed if using handheld mixer) for 1 1/2 minutes. Add remaining 1/2 cup of milk mixture and beat 30 seconds more. Stop mixer and scrape sides of bowl. Return mixer to medium (or high) speed and beat 20 seconds longer. 
  5. Fill cones about 3/4 of the way, about halfway up the top inch of the cone. Bake until thin skewer or toothpick inserted in the center comes out clean, about 23 to 25 minutes. 
  6. Let cakes rest in cones and pan for 3 minutes. Gently remove cones from pan and set aside.  Since the cones don't get too hot, it's okay to place them on the counter. Let cool completely, about 1 1/2 hours, and then frost with your favorite frosting.